Video: Wavy Shelf Accent Wall
In this video, Paul Jackman builds an accent shelf wall with lots of curvy ash.
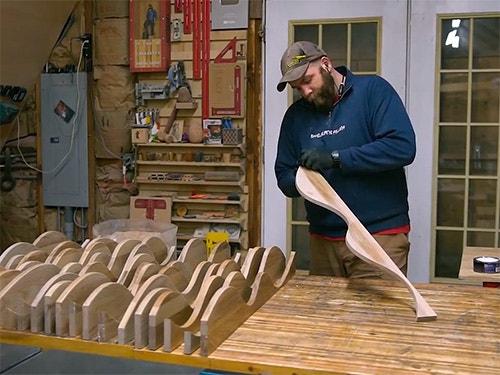
Paul Jackman tackles an impressive feat of woodworking engineering and functional art: a wall made up of curved ash shelving.
You can find more great projects and techniques from Paul Jackman at his website.
Featured Tools:

Paul Jackman: I think you guys would be disappointed in me. I didn't have enough reclaimed ash on hand for this project. I actually had to buy lumber. I honestly can't remember the last time I had to do this, but I'm hoping this will make you respect me again.
I ripped all those pieces of ash down to roughly two inches so that I can alternate the grain to stabilize the panels that are going to be the shelves. That way instead of the board wanting to cup as the wood moves around, that would stabilize it, smiles and rainbows. I have to carry all these boards over to my other shop.
The great thing about having these angle brackets mounted to the bed of the CNC is that they act as clamps, but also registration points. Paired with these hold-down clamps, this work-piece is not going to go anywhere and with these corner brackets, that's going to maintain the setup for every single one of these work-pieces. That means I only have to set the zero point on the first work-piece, and then I can repeat the same exact setup for all 24 of them. Makes things pretty easy for mass production. Never freehand on a table saw.
To finish up this project, I'm going to be using some new Minwax products, including their water-based wood stain, and then maybe some other coloring effects from what they call their design series. I'm very indecisive, so I kind of just ended up grabbing one of everything that I liked since I couldn't decide what I wanted in the store but as you saw, they're water-based wood stain, you can custom tint and we decided on bay blue.
There's a couple hundred different colors that you can choose from, but it's just like paint in the way that you bring it up to the paint counter and they custom tint it, whatever you want. I also got some whitewash color wash and then wood effects, which is an accelerant to like accelerate the weathering, the gray color of the wood. It's basically witchcraft.
I have three pieces of ash here that I did some tests on to pick my favorite color. I picked ash specifically for this project because it has a fun grain like oak, but also has a lot of variation in the coloring of it. All three of these have the blue wood stain, no wood stain, and then we have natural whitewash and then the gray weather effect.
Being the indecisive person that I am, I'm having a hard time deciding. I think I'm going to do a combo of two ideas because of that. The backer panel is going to be the blue stain with whitewash, and then all of these waves will have the gray weathering effect without the blue stain and then both of those will get finished up with their wax.
Well, thank you for joining me for that build, that was the first project of many for the new house. It's also my first time using the tinted colored stain from Minwax. I want to shout out for making this video possible. This product utilized Minwax's water-based tinted wood stain plus their color wash wood effects and soft-touch wax. These are all from their new design series of products.
Now, these products are all amazing for highlighting the grain and really making it the feature of your project. All these Minwax products and more are available at your local Lowe's store, plus at lowes.com. I'll link down below everything that I used for this project. We live near the coast so because of that in the shape of the project, my goal was to create sun-faded weathered beachy look with a pop of color and a lot of character. I think that's exactly what I did and I won't you tell me otherwise.
Now, the stain is available as either a solid or semi-transparent version which is what I use because I wanted the grain to remain very prominent. Also, you can tint it like I did or you can choose from a handful of different colors that are pre-mixed off the shelf. Now, on top of all this color treatment, I used Minwax's soft-touch wax for the perfect matte finish and it's a nice feeling on the wood not that I'm going to be touching anything higher than the bottom couple of shelves but I know it's there and really, in the end, isn't that what matters? Besides all that, the great thing about these finishes aside from the wax is they're all water-based which means really easy application and clean up along with low odor and quick dry time.
Well, that's all I have to say about that I'll be monitoring the comments if you have any questions about the build check out all the links down below to all the sponsors that made this video possible and I'll see you on the next build which might involve pallet wood. It'll definitely involve pallet wood.


Keep the inspiration coming!
Subscribe to our newsletter for more woodworking tips and tricks