Making a Wood Dresser Valet Box with Brass Inlays
This project shows off some simple, but highly effective visual enhancements like alternating stain and brass inlays.
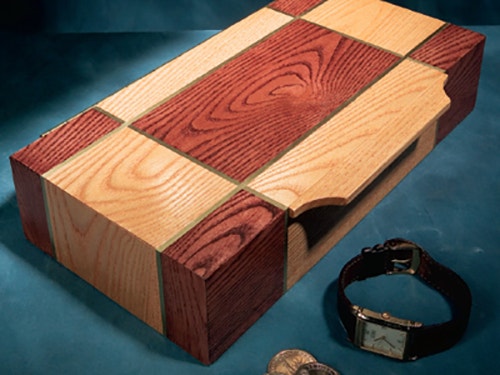
One day, I just got plain old tired of all the clutter on my dresser, so I designed this sweet little wood dresser valet box. The "show" faces of the box are cut abutting each other from one blank of 1/2"-thick ash, and the adjoining corners are mitered.
For the dresser valet box diagrams and materials lists in PDF Format, click here to download the PDF.
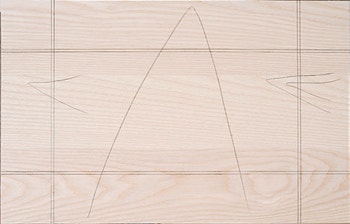
This makes the valet box appear to have continuous grain. Take a look at the ash blank layout and it should become clear how it’s done. I couldn’t find a piece of ash wide enough for my blank, so I glued it up from well-matched boards and hid the glue joints under the brass inlay grooves.
Avoiding Potential Pitfalls
In the grand scheme of things, this valet is not that hard to build, but it does takes time and patience to get it to all fit together precisely. Here are a few pitfalls I discovered along the way, so you can avoid them:
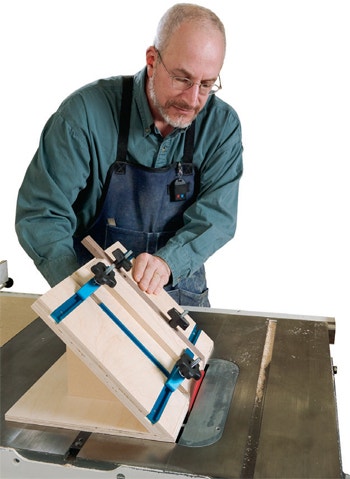
Cutting the mitered and beveled edges accurately and safely presents a problem. I built a small parts mitering jig to solve this. It's basically a table saw jig guided by a miter bar. T-tracks, hold-downs and stops secure and position the parts for cutting.
The lid hinge is another issue. Being set into beveled edges of 1/2"-thick stock means the screws have very little wood to bite. The hinge mounting screws must be shortened to 1/4" long to avoid penetrating through the outside of the box. Although a 1-1/2"-wide piano hinge is rather large for a small box like this, its screw-mounting holes are farther from the hinge barrel than on narrower piano hinges, and because of this benefit, it ended up being the best option.

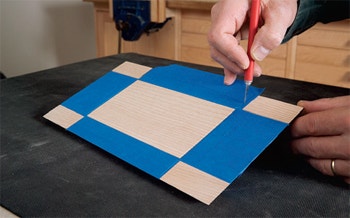
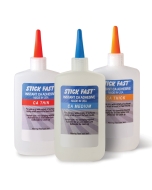
The brass inlay was another quandary to tackle. It's designed to be pressure-fit into 1/8"-wide x 1/32"-deep grooves. On a larger project, you could hammer it into the grooves. But on a small piece like this, it would be too easy to break the joints by "banging" on the box. I routed the inlay grooves a smidgen wider so I could press the inlays in by hand with minimal pressure, and I glued them down with cyanoacrylate (CA) adhesive.
Many Samples Ensure Staining Success
This valet is a good opportunity to hone your finishing skills. As a peer of mine once said, "I spend a hundred hours building a fine piece, then in less than one hour I mess it up applying finish." This does not need to be the case if you do your homework first. The key to success is to make test samples, more samples and even more samples. Know exactly what finish and stain you're going to use, and how you'll apply it, beforehand. Using your project as a testing ground is a huge mistake — but one we’ve all made.

Here's how I approached staining and finishing the valet: I had pretty much decided on a maple color stain for the light areas, but I vacillated on the darker complementing stain. I picked an early American color and a red mahogany to test. I started by making an ash sample board, which I orbital-sanded to 220-grit. I divided the length in thirds and applied the three stain colors. I let them dry 24 hours, divided the width in thirds, and applied three sample finishes (satin wipe-on poly, gloss wipe-on poly and gloss spray-on lacquer). The results showed that my maple color stain was a good choice, the early American color stain was not the color I wanted for the dark areas, the red mahogany color stain was good but too light, and the finishes were all fine.

I noticed sanding swirl marks in the darker stains (which is typical), so I knew I needed to straight-line hand sand prior to staining. I also know from experience that straight-line hand sanding produces darker staining results because it opens the grain more than orbital sanding with fine grits, and coarser grit hand sanding will make even darker results. I made more samples.

This time, I orbital sanded to 220-grit, hand sanded with 150-grit and then 180-grit. I applied two coats of the red mahogany color stain, applied the lacquer, and that gave me the results I wanted. I made another sample to be sure the maple color stain would still be good for the light areas, and it proved to be spot on.

Even though all the finishes looked good, I decided to use the spray-on lacquer for a few reasons. It was very easy to apply, and it would be easy to get it into the nooks and crannies of the small valet. It dried relatively fast, had a nice build and sheen and was easy to sand and recoat. I feared wiping on a finish could drag some of the dark stain onto the light stain and mess up my hard work.
Applying the Stain and Finish

Follow the staining and finishing steps in the photos. Be very careful when you apply the stain so as not to smear it on the inside of the valet, which is intentionally left unstained. Also be very careful when sanding between the coats of finish. It’s surprisingly easy to sand through the finish and remove the stain, especially on edges. With dark stains, this really glares out.

To avoid this problem, apply two light coats of finish without sanding between them. Use 320-grit sandpaper to gently remove any nibs in the second coat of finish. Then use an ultra-fine 3M Scotch-Brite® pad (or #0000 steel wool) to smooth the finish. Remove all dust, and then apply a third and final coat of lacquer. You'll end up with a fine project!

Keep the inspiration coming!
Subscribe to our newsletter for more woodworking tips and tricks