Project: Turner's Tool Holder

Build a lathe-based tool holder to make your turning more efficient. An easy weekend project.
When you're in the middle of a turning project, it's handy to have all of your lathe tools within easy reach. This tip-out tool holder can bring that convenience to most open-stand lathes. It converts unused space between the legs into practical storage for 10 tools. PVC tubing holds each tool stationary and prevents the cutting edges from contacting one another. The holder is made to fit our Delta 1440 lathe shown above. Be sure to measure your own lathe's stand> and adjust the Material List part sizes as needed.
Flitch-cut Veneer
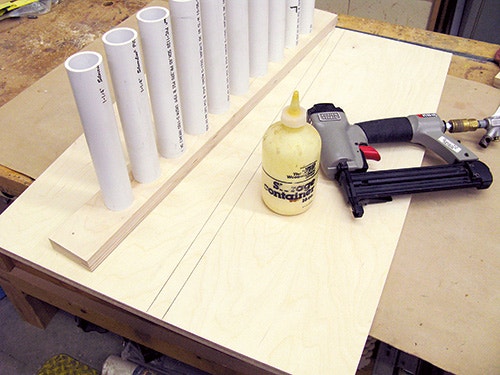
Get this project underway by cutting the main panel and tube stretcher (pieces 1 and 2) to size. Then, tilt your table saw blade to 3 and bevel-rip one long edge of the stretcher. This beveled edge will enable the bottoms of the tubes to rest against the main panel when assembled. Bore ten 1-1/2"-diameter holes through the stretcher, spaced evenly along its length. Sand the panel and the stretcher up through the grits at this point to prepare them for further assembly. Step to your miter saw and cut your PVC pipe into ten, 10" lengths (pieces 3). You may need to sand down one end of each tube slightly so they will fit into the stretcher holes. Mount the tubes in the stretcher with epoxy.

Once the adhesive sets, determine the position of the stretcher on the main panel. Line it up so the bottom ends of the tubes are flush with the bottom of the panel, and draw a pair of reference lines to mark the stretcher's location. Secure the stretcher to the panel with glue, clamps and a few brads.
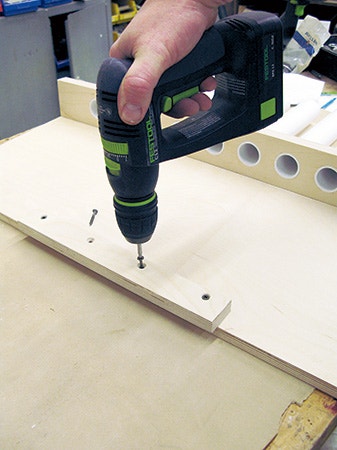
Cut the tilt stop (piece 4) to size and center it on the inside of the top edge of the panel. Extend the stop a bit past the panel edge to create an overlap, and screw it in place. (Note: Remember, this is for our Delta 1440 lathe ... your requirements may end up eliminating or resizing this piece.)
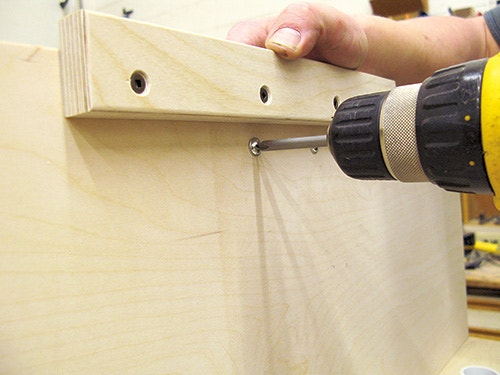
Next, fasten a pull (piece 5) to the outside face of the panel about 1-1/2" below the top edge. Apply your choice of finish now.
Installing the Project on Your Lathe
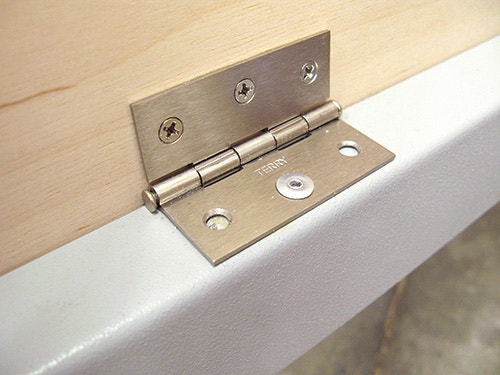
We used three hinges (pieces 6) to mount the tool holder to the lower stretcher of our lathe stand. You'll need to locate the hinges on the outside face of the panel so the tilt stop will make contact with your lathe bed with the hinges mounted to the lathe's stretcher. Center one of the hinges and space the other two about 2" in from the panel ends.

A pair of chains (pieces 7) will stop the tool holder when you pull it open. Fasten one end of each chain about 1-1/2" in from the top corners of the inside face of the panel with #8 x 5/8" wood screws or equivalent panhead screws.
It's time to fasten the hinges to the metal stretcher. We used a single pop rivet through each hinge to make these connections secure and yet minimize extra drilling, but you could also use machine screws and nuts.

Now, tip the tool holder out from the lathe about 10" (far enough that its weight will keep the holder open for use), and locate positions on the back legs of your lathe to install the other ends of the chains. Drill these two holes, and loop the end links through them to wrap up the project.

Click Here to download a PDF of the related drawings.


Keep the inspiration coming!
Subscribe to our newsletter for more woodworking tips and tricks