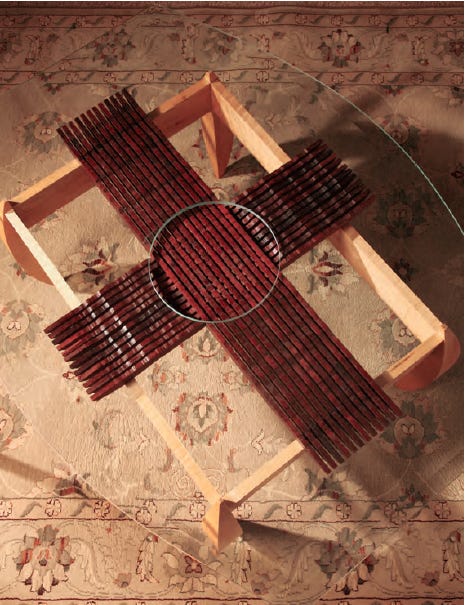
Project: Glass Top Coffee Table
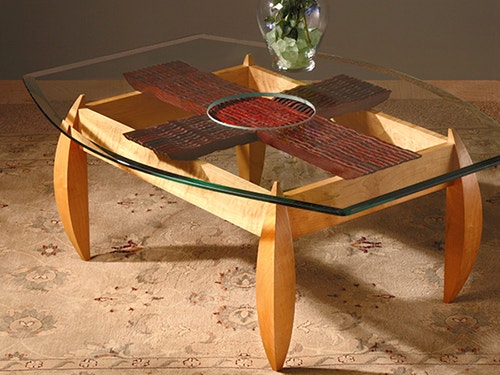
This centerpiece glass table combines the best parts of standard craftsmanship with complex latticework and design to display all levels of your woodworking ability.
Ten years ago, I had an idea involving four 2-1/2" x 17-1/4" scrap blocks of maple that were left over from a previous project. That project, a dining room table entitled "Dinner Music," incorporated many of the details that inspired this coffee table. I call it "Dinner Music II: the Aftermath," because it represents the natural progression from an evening meal to the couch.
The coffee table has one thing its predecessor didn't: a glass top, something I couldn't afford at the time. A custom-shaped piece of 1/2" glass with a 15" hole cut in the middle just wasn't in the budget.
>
But back to the legs. I was sitting there at my bench looking at these nice sticks of maple, and I began to wonder what it would look like to form adjoining radii, constructing them in a manner not unlike cabriole legs.

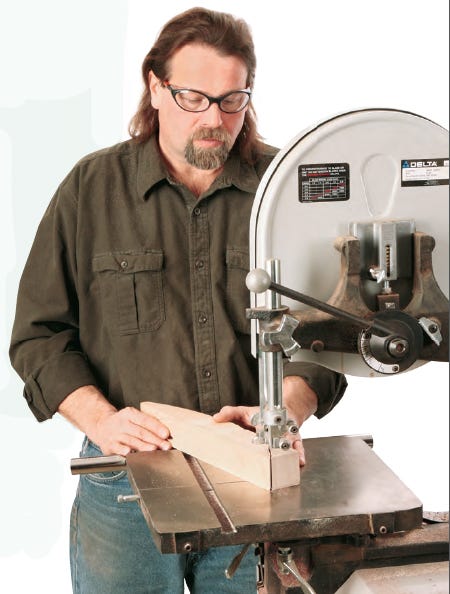
It's a technique where you trace your pattern onto adjoining leg faces, starting by making a cut through one face to form the profile, then reattaching the waste wood with double-sided tape, rotating the leg 90°, retracing the shape and cutting the adjoining profile. In this case, the technique revealed an interesting and cool compound shape. It's fun to do, but, as with traditional cabriole legs, be sure to complete your joinery first — it's easier and far more precise that way.
I quickly settled on the shape of the legs and found a nicely figured maple board sized perfectly to make the ends and sides (which form the apron) of the table. I also had a nice stash of purpleheart lying around, and this helped hatch the idea of constructing a decorative cruciform shape that would present a "woven" appearance, but without actually weaving it. I just love making more work for myself, especially when it comes to joinery.
For the Table Leg Diagram and Materials List, click here.
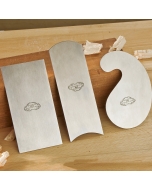
While the shape of each leg was very simple, it also needed to be precise, so I included making a leg template in the design process. I used a stick compass to make the curves for the legs, and in doing so I was quickly able to see that normally shouldered tenons (with the tenon in the center of the 3/4" apron boards) would project beyond the leg curve.
So I decided I would offset the apron tenons flush with their outside faces (called a barefaced tenon), locating their inside faces flush with the inside corners of the legs. This construction would form a clean, simple detail when seen through the glass top. I then shifted the mortises on the legs down about 1-1/8", the thickness of the purpleheart leftovers that would become the cruciform centerpiece. With the construction details determined, I moved on to the machining steps.
For the Coffee Table Exploded View and Materials List, click here.
Making the Parts
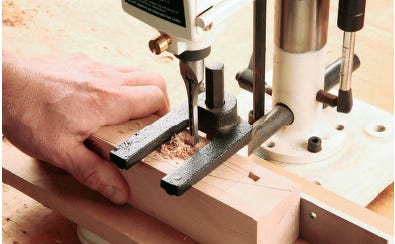
Shellac or poly, glossy or flat — which looks better? Tails or pins, mortises or tenons ... which should you make first? Without taking time to solve all of woodworking’s raging controversies, I can tell you that I make my mortises first, and then fit the tenons to them. In this case, I used a benchtop mortiser to chop the apron mortises. I had to be careful not to cut too deep and chop through what would become the finished curved faces of the legs. For overall joint integrity, I cleaned up the bottom of the mortise with a 1/4" chisel to take out the roughness the mortiser tends to leave behind.

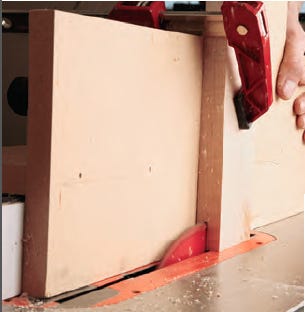
To minimize the amount of sanding required on the legs and at the same time ensure uniformity, I template-routed them using a two-sided jig. I fastened the legs to the jig, using double-faced tape, and finished their shape on the router table using a pattern-cutting bit. The trick here is to rough-cut the legs to within 1/16" of their finished dimension. This will give you less resistance, especially on the uphill climbs through the grain where the danger of kickback and chip-out are greatest. Use a 3-1/4 hp router for best results. After shaping one curved side (raising the bit step-by-step to smooth the entire surface), flip the leg over and re-tape it to the other side of the jig to shape the other face of the leg. Another option would be to use a stationary bench sander to smooth them, but be careful not to change their shape in the process.
Next, I cut the side and end aprons to length and width, and set up a shop-made tenoning jig on the table saw. I finished the tenons with a crosscut controlled by my miter gauge and stand-off blocks on the fence.

It is a simple, two-step process, but I always check my setup on scrap lumber first. One little trick on the tenons was that I cut a tiny micro-shoulder on the top of the tenon. Before I completed the final fitting for the mortises, I took a detour to the drill press and bored 3/16"-diameter dowel holes into the top edge. These will help secure the woven lattice.
Note the mitered ends on the tenons: they just miss each other within the mortise. You can cut those with a backsaw. Another trick I used when fitting the tenons was to remove just a smidge of material from the face of the aprons using my jointer. It worked well (but don't take off too much!).
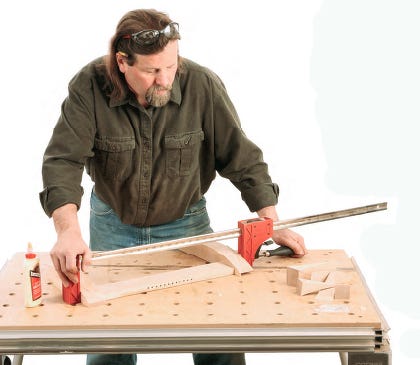
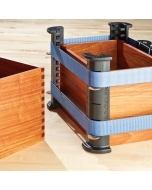
Test clamp the end and side subassemblies together without glue, using scrap that was cut away from the legs as clamping cauls (perfectly shaped!) and, when they fit, go ahead and glue the base section together.
Weaving the Lattice
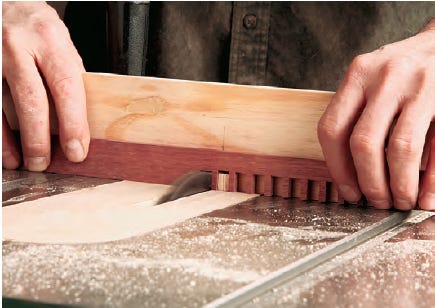
What happened next could be described as multiple, maniacal bridle joint-mode. I set up an indexing system using the miter gauge on my table saw to precisely locate each small notch on the long and short lattice. I made an indexing key and mounted it on my miter gauge. I cut these one at a time.
The important thing is to make sure the cuts are all very accurate — if the cuts vary 1/64" over a few of them, it’ll be a mess. If you cut these individually on the table saw as I did, you must consider everything you’re doing, even how you place your hands and push the stock through the saw. Use some sideways force to keep the miter gauge riding on the left or right side of the slot in the saw table for every single cut, 288 in all. Challenging but fun! My advice: practice with scrap, lots of it. And don’t sweat the breakage — those little pieces glue right back in and no one will know the difference except you, me and thousands of readers like you!
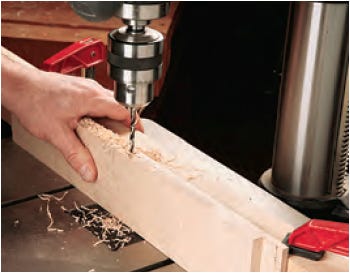
Earlier, I bored holes in the apron for the 3/16" dowels that secure the lattice to the aprons. Now it was time to drill the reciprocal holes in the purpleheart. I set up stop blocks on the drill press, spending the necessary time (and supply of scrap) on setup to make everything go together right. After drilling, I then went back to the patterns to trace the irregular shapes onto the lattice strips.

When making these shapes, I incorporated high spots to bear the weight of the glass in the appropriate areas. I figured that a 9" hole in the middle of a sheet of glass could be a major stress-riser (meaning, a weak place in the sheet that becomes the breaking point when subjected to load; ask the solid-surface countertop folks). After assembly, I would turn it upside down on my bench, locate the high spots and level them with a hand plane, belt sander or some other tool.
Now, for the most dreaded assembly of all — the cruciform lattice work. I'm not sure what kind of advice I would give regarding this arrangement, but I can tell you I did pull it off, and I only broke off three of the little short grain pieces while doing so. If you dry-fit the purpleheart together and it works, I say leave it without glue: it has little structural importance and the weight of the glass (50 lbs. or so) will keep everything in place.

How to smooth or treat band-sawn edges of the purple heart was a dilemma. In the end, I simply scraped these edges using a steel card scraper, working downhill with the grain from all the high points. It was easier than I suspected it would be. The result is a rather burnished effect that works well on the edges of this freakishly hard, stringy wood.
Important note: use a straightedge to check that there are no high spots in the lattice assembly (they'd add stress to a glass table) — plane or sand them down to exactly the level of the ends of the legs. The finish is shellac, sprayed on from an aerosol can. Very simple and easy to fix. It's also easy to repair and, of course, with a piece of furniture like this you don't really need bar-top durability.
Finally, I worked out the final shape of the top by looking at several MDF mock-ups. When I was happy with the shape, I debated whether to put the bevel on the edge — but in the end, I was happy I had. It adds an important shadow line that defines the edge of the glass very well. I ordered the glass 1/2" thick, with the edges polished, except in the center hole, which was just sanded.
Well, there's the short story, and it all started with a few pieces of scrap lumber sitting on my workbench!


Keep the inspiration coming!
Subscribe to our newsletter for more woodworking tips and tricks